
 how-to
How to Install Recessed Lighting in Existing Ceilings
Table of Contents
- Tools, Materials, and Prerequisites
- Safety First: Cutting Power and Locating Ceiling Joists
- How to Fish Wire Through Ceiling and Cut the Drywall Hole
- IC-Rated Recessed Light Fixtures and Insulation Contact
- Wiring and Connecting the Junction Box
- Installing the Housing and Finishing the Recessed Lighting
- Recessed Lighting Installation Cost and Code Compliance
- Conclusion
- Frequently Asked Questions
Last Updated: September 16, 2026
Tools, Materials, and Prerequisites
Installing recessed lighting in an existing ceiling starts with the right tools and a planned layout. This guide covers the full process, from mapping joists to the final trim ring.
What You'll Need Before You Start
Gather your tools first to avoid mid-project hardware store runs.
- Tape measure, pencil, and a stud or joist finder
- Drywall saw and a recessed light template
- Voltage tester and a non-contact circuit tester
- Fish tape, wire strippers, and wire nuts
- Non-metallic cable (Romex) sized to the circuit
- LED wafer lights or IC-rated fixture housings
- Drill with a hole saw or paddle bit
- Ladder, safety glasses, and a dust mask
Planning Your Spacing Layout
Spacing determines whether the room feels evenly lit or spotty. Many installers keep fixtures roughly 2 to 3 feet from walls and space them evenly. Mark every location before you cut, and check that each mark clears a joist.
Safety First: Cutting Power and Locating Ceiling Joists
Safety and joist location come before any cutting. Turn off the circuit at the breaker panel, confirm it's dead with a voltage tester, then map the ceiling structure so you don't saw through a joist or hidden pipe.
How to Fish Wire Through Ceiling and Cut the Drywall Hole
Fish tape lets you pull non-metallic cable through the ceiling cavity without opening up the drywall.
Making the Cut with a Drywall Saw
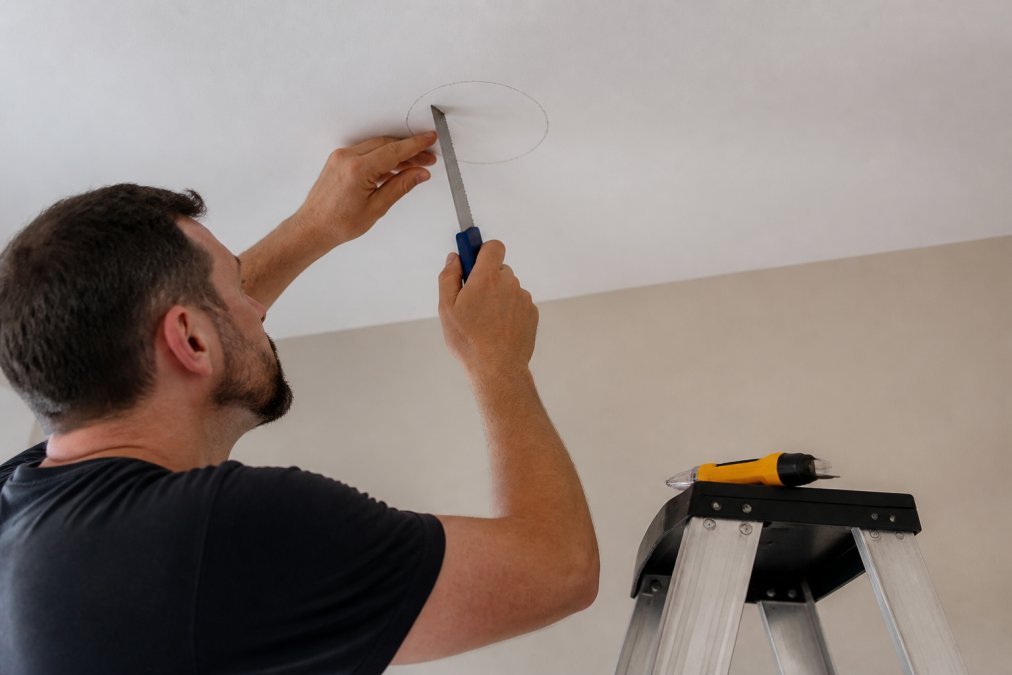
Trace the template at each location, then cut with a drywall saw using slow, controlled strokes. Forcing it tears the paper facing and leaves a ragged edge trim rings can't hide. Cut slightly inside the line so the fixture seats snugly.
IC-Rated Recessed Light Fixtures and Insulation Contact
IC-rated recessed light fixtures are built to sit in direct contact with ceiling insulation without creating a fire hazard. In any ceiling with blown-in or batt insulation, IC rating is not optional, it is the difference between a code-compliant install and a fixture that can overheat the insulation around it.
What "IC" Actually Means
The letters stand for insulation contact. Under the National Electrical Code, a recessed luminaire not marked for insulation contact must be installed with a minimum clearance, typically 3 inches, between the housing and any thermal insulation, measured from the housing (not the trim ring) on the sides and top. An IC-rated fixture carries a label on the housing, usually near the junction box, reading "Type IC" or "Suitable for contact with insulation." If you cannot find that label, assume the fixture is non-IC.
Why It Matters in an Existing Ceiling
In new construction, insulation goes in after the cans are set, so the installer can keep batts back from a non-IC housing. In an existing ceiling, the insulation is already there, pulling it back from every fixture is messy, hard to verify from below, and easy for a future insulation top-off to undo.
Matching the Fixture to the Ceiling Above
Before you buy, look at what is above the ceiling:
- Blown-in insulation: Assume deep coverage. Choose IC-rated fixtures and confirm the housing height clears the insulation depth plus the joist bay.
- Batt insulation: IC-rated cans can touch the batts directly. Non-IC cans need the batts pulled back and a rigid barrier installed to hold the clearance.
- No insulation (interior ceiling between floors): A non-IC fixture is technically allowed, but IC-rated LED wafers are usually cheaper and easier to install anyway.
- Fire-rated ceiling assemblies: The fixture and any penetration must maintain the assembly's rating. Check the assembly listing before cutting.
Clearance and Labeling Checklist
- Read the label on the fixture housing, not the box it shipped in.
- Confirm "Type IC" or "Suitable for contact with insulation" is printed on the housing.
- For airtight performance, look for the "AT" or "Airtight" marking as well.
- Verify the fixture's maximum lamp wattage matches the lamp or LED module you plan to use.
- Keep the manufacturer's installation instructions on site, inspectors often ask to see them.
If the ceiling above your planned location is packed with insulation and you are unsure of the depth, probe it with a stiff wire or long screwdriver through a small pilot hole before committing to a fixture. Five minutes of checking beats discovering a clearance problem after the drywall is cut.
Wiring and Connecting the Junction Box
The junction box is where the circuit cable meets the fixture wiring, and where code compliance matters most. Every connection must be made inside an approved box with a cover, never left open in the ceiling cavity.
Making Electrical Connections Safely
The ground wire is not optional. It's the safety path that trips the breaker if a hot conductor ever contacts metal, and inspectors check for it on every recessed lighting job.
Most LED wafer lights use a quick-connect wiring harness instead of individual wire nuts, which speeds up the connection and reduces the chance of a loose splice.
https://mistervoltsusa.com/contact →
Installing the Housing and Finishing the Recessed Lighting
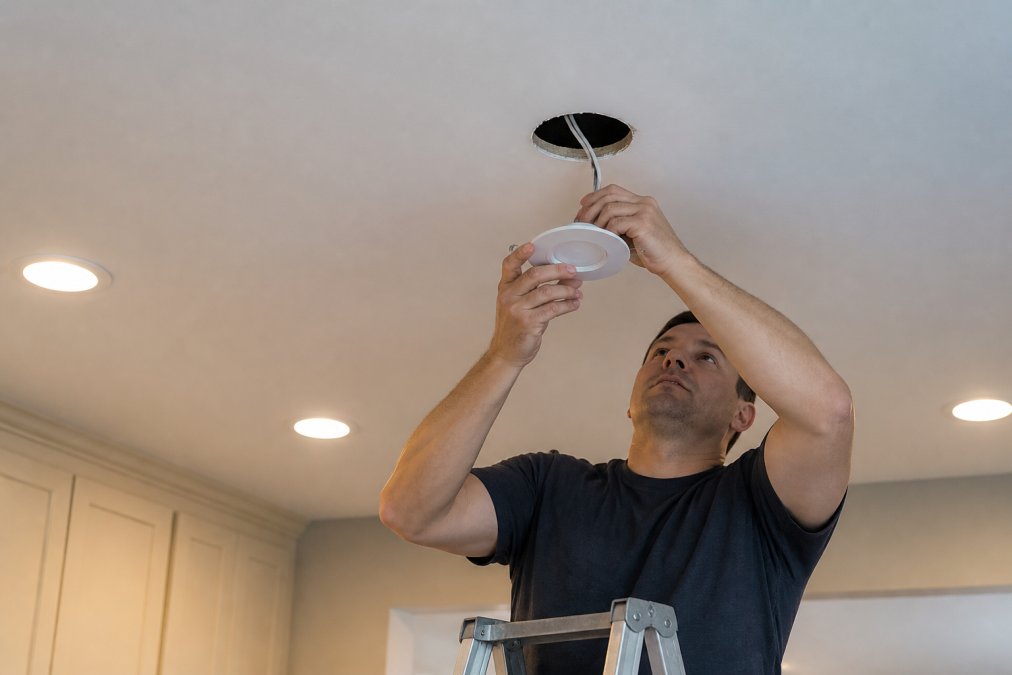
Housing installation depends on fixture type. IC-rated cans with adjustable brackets mount to joists with screws. LED wafer lights skip the housing entirely: push the spring clips into the ceiling and the fixture snaps flush against the drywall.
Recessed Lighting Installation Cost and Code Compliance
Recessed lighting installation cost depends on fixture count, ceiling access, and whether a new circuit is required. A single-fixture swap on an existing circuit is the cheapest version of this job. A full-room layout with new wiring, a new breaker, and a permit sits at the other end. Because pricing varies by scope, Mister Volts provides a competitive quote after reviewing your project.
What Drives the Cost
Four variables move the number more than anything else:
- Fixture count and type. LED wafer lights are typically less expensive per unit than traditional can-and-trim assemblies, and they install faster because there is no housing to bracket.
- Circuit work. If the existing circuit has capacity and the run is short, you may only need cable and connectors. A new dedicated circuit adds a breaker, a home run to the panel, and panel work.
- Ceiling access. A ceiling with an attic above it is faster to wire than a finished ceiling with no access, where every foot of cable has to be fished blind.
- Finish work. Patching, priming, and painting around new fixtures is a real line item, especially in older ceilings with texture.
The Permit Question Most Guides Skip
When a permit is typically required:
- Adding a new circuit or extending an existing one to reach the new fixtures
- Adding a new breaker at the panel
- Any work that involves opening the panel cover for more than a like-for-like breaker swap
When a permit is often not required:
- Replacing a fixture on an existing, properly wired circuit with no new cable
- Swapping a trim or lamp on an existing housing
Permit rules are set locally, so call your building department and describe the scope. Ask two questions: does this scope require a permit, and does it require an electrical inspection? Most jurisdictions that require the permit also require the inspection, where the work gets checked against the adopted edition of the National Electrical Code.
What an Inspector Actually Checks
Knowing the inspection checklist in advance is the easiest way to pass on the first visit:
- Box fill. The junction box must be large enough for the number and gauge of conductors entering it. Overfilled boxes are one of the most common red tags.
- Cable stapling and support. Non-metallic cable must be secured within the required distance of the box and supported along the run.
- Ground continuity. Every fixture and every metal box must be bonded to the equipment ground.
- Connections inside approved enclosures. No splices left open in the ceiling cavity.
- Fixture listing and rating. The fixture must be listed for the application, and IC-rated where insulation contact exists.
- Clearances. Recessed fixtures must respect the clearances marked on their labels.
Skipping the permit does not make the work invisible, it makes it a liability. Unpermitted electrical work is a standard disclosure issue at resale, and many buyers' inspectors flag new fixtures that have no matching permit record. The cost of pulling the permit is almost always less than the cost of resolving it later.
Dimmer Compatibility and Patching Tips
Not every dimmer works with every LED. Older dimmers designed for incandescent loads often cause flicker, buzzing, or a limited dimming range with LED fixtures. Check that the dimmer is rated for LED loads and matches the fixture's driver. If you are installing multiple fixtures on one switch, confirm the dimmer's minimum load, some LED dimmers need a minimum wattage, and a single wafer light may fall below it.
| Task | Typical Sequence | Watch For |
|---|---|---|
| Confirm permit scope | Before buying materials | Local rules vary; call the building department |
| Map joists and layout | Before any cutting | Hidden pipes, ducts |
| Cut holes | After layout confirmed | Ragged edges from forcing the saw |
| Fish cable | After holes are cut | Drilling joists off-center |
| Wire connections | After cable is run | Loose wire nuts, missing ground, box fill |
| Install fixtures | After connections tested | Non-IC fixtures in insulated ceilings |
| Schedule inspection | After rough-in, before drywall patch | Missed ground, unsupported cable |
| Patch and paint | After fixtures work | Under-feathered joints |
Conclusion
Recessed lighting installation rewards patience more than speed, and the steps that matter most, verifying power is off, confirming IC rating, and making solid connections inside a junction box, are the ones inspectors check. If your project involves a new circuit, a full room layout, or a ceiling you'd rather not cut into yourself, Mister Volts can handle it.
Frequently Asked Questions
How hard is it to add recessed lighting to an existing ceiling?
Adding recessed lighting to an existing ceiling is a moderate DIY project if you have basic wiring experience and the right tools. The hardest part is fishing wire through finished ceilings and locating joists without causing damage. If your ceiling has insulation or you need to run new circuits, the job becomes more complex. Many homeowners in Macon and Perry hire a licensed electrician for safety and code compliance.
Do I need an electrician to install recessed lighting?
You do not always need an electrician for a simple swap, but new recessed lighting installations involve running cable, connecting to circuits, and meeting electrical code requirements. If you are uncomfortable working inside a junction box or unsure about your panel's capacity, hiring a licensed electrician is the safer choice. Mister Volts provides code-compliant installations for homeowners throughout middle Georgia.
What are the NEC requirements for recessed lighting in insulated ceilings?
The National Electrical Code requires that recessed light fixtures installed in insulated ceilings be rated for insulation contact, commonly called IC-rated. Non-IC fixtures must maintain a 3-inch clearance from insulation, which is difficult in existing ceilings. IC-rated LED wafer lights are designed to sit flush against insulation without overheating, making them the standard choice for retrofits in finished ceilings.
How much does recessed lighting installation cost?
Recessed lighting installation cost varies based on the number of lights, ceiling access, wiring complexity, and whether you hire a professional. Fixture type, dimmer compatibility, and any patching or repair work also affect the total. Mister Volts provides competitive quotes for lighting installations in Macon, Perry, and Warner Robins. Contact us for a personalized estimate based on your project.