 how-to
Outdoor Landscape Lighting Installation: Step-by-Step Guide
Table of Contents
- Plan Your Outdoor Landscape Lighting Layout
- Gather the Right Landscape Lighting Installation Tools
- Low Voltage Landscape Lighting Transformer Sizing Explained
- Step 1: Lay Out Fixtures and Run the Cable
- Step 2: Bury Wire and Make Connections
- NEC Requirements for Outdoor Lighting You Must Follow
- Step 3: Mount the Transformer and Test the System
- Common Mistakes to Avoid in Landscape Lighting Installation
- Frequently Asked Questions
Last Updated: September 9, 2026
Outdoor landscape lighting transforms a home after sunset, adding safety and curb appeal to walkways, garden beds, and architectural features. This step-by-step guide walks homeowners through a low voltage installation from planning to testing, so the finished system looks professional and operates safely for years. The complete process is very manageable for a capable DIYer over a weekend, but it demands patience with layout and strict attention to code.
Before turning a shovel, understand what low voltage outdoor landscape lighting actually involves. It is a 12-volt system that uses a transformer to step down standard household current, powering fixtures along buried cables. Because the voltage is low, the risk of shock is minimal, but the wiring still falls under the National Electrical Code. The smartest approach mirrors how licensed electricians handle residential projects: plan the full layout first, then execute methodically.
Below, we’ll cover a proven order of operations, the tools you need, transformer sizing, and the specific NEC requirements that keep your installation legal and insurable.
Plan Your Outdoor Landscape Lighting Layout
The most common mistake in landscape lighting is buying fixtures first and planning the layout second. A thoughtful plan prevents wasted cable, overloaded transformers, and patchy light pools that ruin the effect.
Start by walking your property at night to note dark zones near steps, paths, and entry points. Then sketch your yard to scale, marking every fixture location. Group fixtures into zones based on proximity, since each zone will run on its own cable circuit from the transformer. Decide where the transformer will mount, typically on an exterior wall near a GFCI-protected outlet. Keep each cable run under 100 feet to minimize voltage drop, which dims fixtures at the end of the line. The goal is a balanced composition, not maximum brightness.
Gather the Right Landscape Lighting Installation Tools
Having the correct tools on hand prevents frustrating mid-project stops. Most items are common household tools, but a few are specific to low voltage work.
You will need a trenching tool or flat shovel, wire strippers, and a utility knife for cutting cable. A voltage tester confirms power is off at the outlet before you connect the transformer. For burying cable, use rubber mallet and stakes or a landscape edging tool to create a clean slit in the turf. You also need waterproof wire connectors rated for direct burial, plus a roll of electrical tape as a backup seal. If your layout includes path lights, a rubber mallet for seating stakes protects the fixtures from damage.
Low Voltage Landscape Lighting Transformer Sizing Explained
Transformer sizing determines whether your lights shine at full brightness or fade into a dull glow. The transformer converts 120-volt household current down to 12 volts, and it must supply enough wattage for every fixture combined.
Add the wattage of every fixture you plan to install. Then multiply that total by 1.25 to build in a 20% safety margin. This buffer prevents the transformer from running at maximum load, which shortens its lifespan. For example, if your fixtures total 120 watts, you need at least a 150-watt transformer. Choose a transformer with a photocell or timer so the lights turn on and off automatically. Ignoring this step leads to an overloaded system that trips breakers and produces dim, inconsistent lighting.
Step 1: Lay Out Fixtures and Run the Cable
With the plan finalized, place every fixture in its intended position without burying anything. This dry run lets you adjust spacing and angles before committing to the ground.

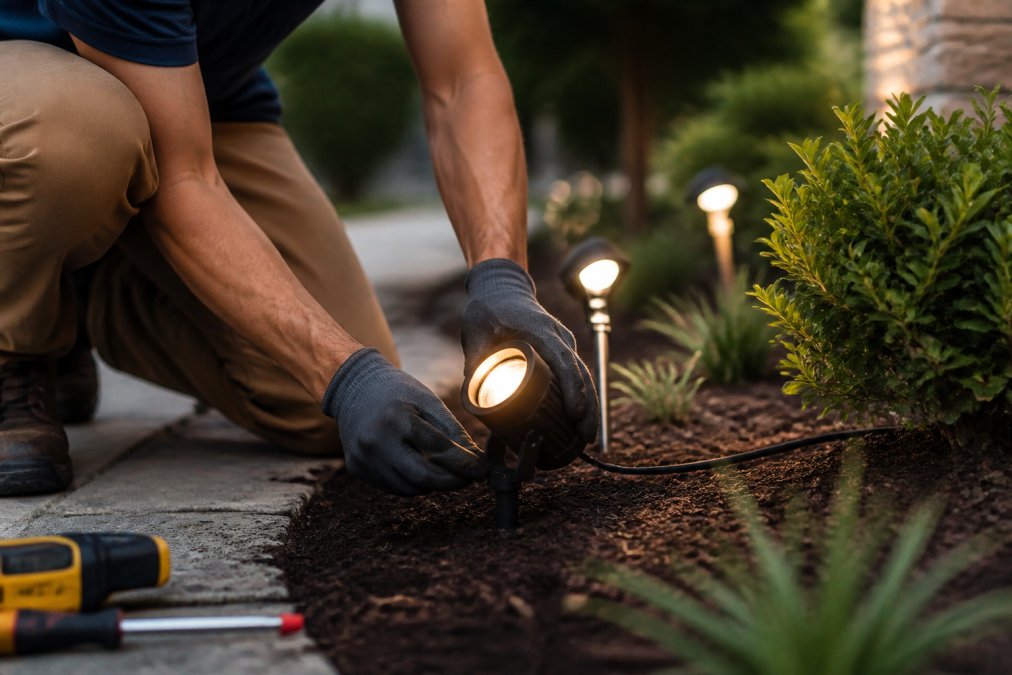
Position fixtures so light pools overlap slightly, creating even illumination rather than isolated spots. Aim path lights to cast light forward along the walkway, not back into the eyes of passersby. Once satisfied with placement, unroll the cable along the route from the transformer to each fixture, leaving slack at every connection point. Do not bury yet. Verify that the cable path avoids areas where you might dig later for irrigation or planting. This step is where patience pays off, since moving a fixture after burial means digging it up again.
Step 2: Bury Wire and Make Connections
After the layout is confirmed, it is time to make the installation permanent. Begin by cutting a shallow trench along your cable route, roughly 3 to 6 inches deep, using a flat shovel or a powered edger. The NEC generally requires low voltage cable to be buried at least 6 inches deep, though local amendments may differ, so check with your local building department (nfpa.org).
Lay the cable in the trench, then make your connections at each fixture. Strip about 3/4 inch of insulation from each wire end, twist the fixture leads to the cable wires, and secure them with waterproof connectors rated for direct burial. Many low voltage fixtures use a simple push-in connector that pierces the cable, but these are prone to corrosion over time. Splicing with proper waterproof connectors is more reliable. After all connections are made, backfill the trench, firming the soil to avoid leaving a raised ridge across your lawn.
NEC Requirements for Outdoor Lighting You Must Follow
The National Electrical Code sets the rules for outdoor lighting, and following them keeps your home safe and your insurance valid. The most important requirement is that the transformer must plug into a GFCI-protected receptacle. This ground fault circuit interrupter shuts off power instantly if it detects a short, preventing shock hazards in wet conditions.
The low voltage cable itself must be rated for direct burial and listed as suitable for outdoor use. The code also requires that the secondary circuit be grounded, and that connections be made in a listed junction box or with connectors approved for the purpose. Splicing low voltage cable without a listed connector violates code and creates a fire hazard. The National Electrical Code provisions for landscape lighting systems specify minimum burial depths and connection standards. A licensed electrician can perform a final inspection to confirm your work meets current code before you rely on the system.
Step 3: Mount the Transformer and Test the System
Mounting the transformer is the final physical step, and placement matters for both function and code compliance. Secure the transformer to the wall using the included bracket, keeping it at least 12 inches above grade to protect it from flooding and snow. The outlet it plugs into should be GFCI-protected and covered by an in-use weatherproof cover.
Before plugging in, double-check all connections and ensure no bare wire is exposed. Plug the transformer in and switch it to the manual on position. Walk the entire layout to confirm every fixture lights up. Check for voltage drop by comparing the brightness of the first fixture to the last on each run. If the final fixtures are noticeably dim, the run is too long or the wire gauge is too thin. Adjust the photocell or timer settings so the system activates at dusk. Let the system run for a full evening to confirm it performs as designed.
Common Mistakes to Avoid in Landscape Lighting Installation
Many homeowners make avoidable errors that lead to premature failures or unsafe conditions. The most frequent mistake is overloading the transformer, which causes breakers to trip and shortens the life of both the transformer and the bulbs.
Another common error is using inadequate wire connectors that allow moisture to corrode the splice. Always use waterproof, direct-burial rated connectors. Failing to bury cable at the required depth leaves it vulnerable to damage from aerators and edgers. A less obvious mistake is aiming fixtures directly at windows, creating glare for neighbors and reducing the perceived quality of the installation. Finally, many DIYers skip the electrical permit. Most jurisdictions require a permit for outdoor wiring, even low voltage, and a summary of electrical permit requirements for residential outdoor work helps clarify what applies locally. Skipping the permit can complicate a future home sale when the inspector flags unpermitted work.
Beyond these basics, the most consequential mistakes happen when homeowners treat the project as a single, monolithic task rather than a phased electrical upgrade. This is especially true if you are also addressing legacy wiring issues in your home. A common pattern is to plan a full landscape lighting system while ignoring that your outdoor circuit may be tied into an aging electrical system. Before you start digging, determine whether your existing outdoor receptacle is on a circuit that also serves indoor loads. If it is, and you plan to add a transformer that draws 150 watts or more, you risk tripping that circuit whenever someone uses a vacuum indoors. The fix is to dedicate a circuit to the landscape lighting transformer, which may require running a new line from your panel. This is a task for a licensed electrician, but planning for it upfront prevents a frustrating post-installation discovery.
A second high-impact mistake is failing to sequence your work when you are also planning other outdoor projects. If you are installing a new patio, irrigation system, or retaining wall, do the landscape lighting cable runs before those projects are finished. Burying cable after a patio is poured means trenching under or around the new hardscape, which adds labor and risk of damage. Coordinate the schedule so the lighting rough-in happens before concrete work or major grading. This sequencing also protects your lighting investment from being accidentally severed by a shovel during later landscaping.
Finally, do not neglect the transformer's placement relative to future snow removal or landscaping equipment. Mounting it too low, below 12 inches, exposes it to damage from a snow blower or string trimmer. Mounting it in a location that will be blocked by a growing shrub or a new fence reduces access for maintenance and can cause the photocell to malfunction, leaving your lights on during the day. Walk the proposed transformer location at different times of day and year to confirm it will receive true dusk light and remain accessible.
A well-executed low voltage landscape lighting installation elevates your property and runs reliably for years with minimal upkeep. The key is respecting the sequence: plan, size the transformer, lay out, bury, and test. When the project involves tapping into your home’s main panel, adding new circuits, or complying with complex local codes, the safe move is to call a licensed electrician. Mister Volts provides code-compliant installations and can also inspect DIY work to ensure it meets NEC standards. Our licensed electricians serve residential clients with competitive quotes and precise workmanship. Get started with Mister Volts and enjoy a professionally lit landscape.
Frequently Asked Questions
Do I need a permit for outdoor landscape lighting installation?
Most low voltage landscape lighting installations do not require a permit because the system operates at 12 to 15 volts. However, local building departments set their own rules, and some require an electrical permit even for low voltage work. Check with your local code enforcement office before you start. If your project includes line voltage wiring, a 120 volt connection, or new circuits from your panel, you will need a permit and an inspection. A licensed electrician can pull the permit and schedule the inspection for you.
How do I calculate the transformer size for my landscape lighting?
Add up the wattage of every fixture you plan to connect. Multiply that total by 1.25 to build in a safety margin. The result is the minimum transformer wattage you need. For example, ten 12-watt fixtures draw 120 watts, so you would need a transformer rated for at least 150 watts. Also consider voltage drop on long cable runs over 100 feet, which may require a larger transformer or thicker wire. If you are unsure, a licensed electrician can perform a load calculation for your layout.
What is the difference between low-voltage and line-voltage landscape lighting?
Low voltage lighting runs on 12 volts through a transformer that steps down standard household current. It is safer to work with, uses smaller wire, and is the standard choice for most residential paths, gardens, and accent lighting. Line voltage lighting operates at 120 volts and requires conduit, weatherproof boxes, and GFCI protection under the NEC. Line voltage is typically used for floodlights or security lights mounted on the house. For DIY installation, low voltage is the practical option. For line voltage work, hire a licensed electrician.
Can I install landscape lighting myself or should I hire a professional?
You can install low voltage landscape lighting yourself if you are comfortable digging trenches, making simple wire connections, and following the NEC rules for burial depth and transformer placement. The job requires basic tools like a shovel, wire strippers, and a voltage tester. If your design includes line voltage wiring, new circuits, or connections inside your electrical panel, hire a licensed electrician. A professional also helps when you want a complex layout, need to integrate lighting with a smart home system, or want to ensure the work passes a home inspection.